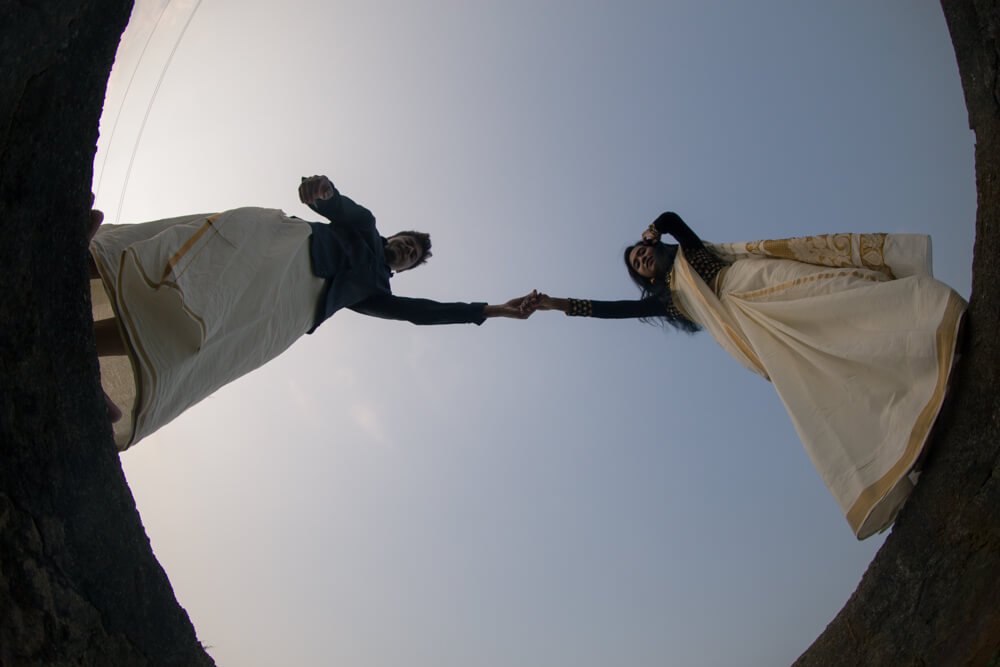
Adding the fish-eye effect to your photos
Dynamic lenses for your camera makes your photography an expensive task. But these lenses are great when it comes to effects such as fish-eye, it is quite expensive and it not affordable for everyone. Photoshop Elements makes it easy to recreate even the toughest of lens effects. The fish-eye impact calls upon the exceptional twisting channels that are particularly intended to twist your picture unfit. The one that’s been put to use here is Spherical, which might be utilized either convex or concave when distorting an image. We likewise need to utilize a thick round vignette, which structures the passage shape synonymous with excellent fish-eye-style photos.

The fisheye effect to your photos by editing software
Save and crop
Save the copy of your image then select the crop tool, hold shift and drag a square cropping boundary over the image with the main part of the subject in the focal point. Press Enter.

Duplicate the image
Go to Layer>Duplicate Layer in the Layers palette. Choose the Elliptical Marquee tool and, holding Shift for a perfectly round determination, drag the apparatus from one corner to the opposite. Leave a slim gap between the edge of the picture and the round choice.
Use the Spherize filter
Go to Filter>Distort>Spherize. In the Spherize menu, set Amount to 100% and Mode set to Normal. Press OK to apply the bending needed for the fisheye effect.
Inverse Selection
In order to create a new layer on the top of the composition, go to Layer>New>Layer. Press OK in the pop-up window to apply a new blank layer above everything else. Opposite the choice on the image by going to the Select menu and choosing Inverse
Fill With black
Give a new mask to the blank layer by clicking on the circle-inside-a-square icon at the base of the Layers palette. Click not on the mask but on the blank layer’s thumbnail on this layer. Go to Edit>Fill Layer. Set dark for Use and click OK for the dark circular border.
Add Softening
To soften the edges of the mask. Click on the layers mask thumbnail on the black fill layer. Go to Filter>Blur>Gaussian Blur. Set Radius to around 33px. This will vary depending on your preference, before hitting ok tick preview to view the result.
-From PhotoMentor Editorial Team